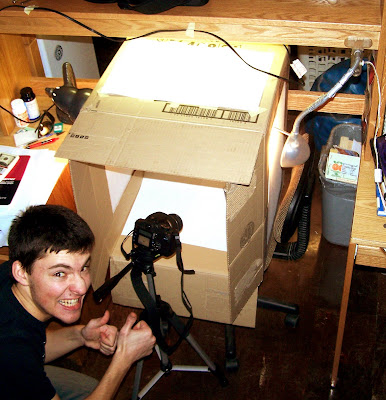
* Jury rigging refers to makeshift repairs or temporary contrivances, made with only the tools and materials that happen to be on hand. Originally a nautical term, on sailing ships a jury rig is a replacement mast and yards improvised in case of damage or loss of the original mast. - Wikipedia

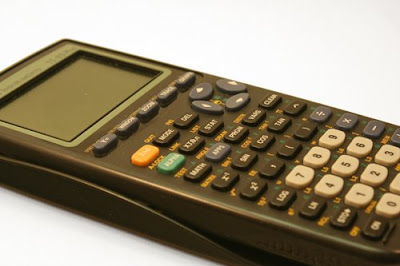
This picture of a calculator is an example of what the box allows you to do. There is soft shadows and no overbearing light source. Not too shabby.
This evening we also decided that we are going to try and convert the area underneath my bed (currently being used for television and drying clothing) into a fully functional darkroom. It has been about a year since I have developed any black and white 35mm so I am itching to get my hands wrist deep in developer once again.
For anyone interested, here is a list of all of the cost of supplies (shipping and handling included) to make this happen...
- Photo Paper ($49.99 + $8.00)
- Trays ($4.99 x 3.00)
- Photo Reel Canister ($6.99 + $8.00)
- Enlarger ($15.99 + $20.00)
- Timer ($10.00 + $10.00)
- Contrast Filters ($6.00 + $5.00)
- Dark Room Light ($10.00)
- Chem Seal Container ($1.95 x 4 + $5.00)
- Film Developer ($6.95 + $5.00)
- Paper Developer ($9.69 + $5.00)
- Film & Paper Fixer ($19.95 + $5.00)
- Tongues ($3.00 x 3)
The total should set us both back a little over a hundred dollars but it will totally be worth it. We are thinking of selling framed prints at about $20 a piece. The price, comparable to most original framed prints, is actually incredibly inexpensive. All we wish to do is make sure that the darkroom is capable of paying for itself.
This is a blue print of what I envision for my allotted workspace.
 If you are unfamiliar with darkroom photography, I will try to elaborate. The object in the left hand corner is the enlarger. It holds the blank piece of photo paper and the negative (or image that you would like to use) and projects the negative onto the paper. Once you have exposed the paper to the image, you take the paper (without exposing it to light) and drown it in four different trays of liquid. After this process is complete, you hang the picture up to dry.
 I splurged on a haircut today. It was worth it.
Speak easy,
Neil

1 comment:
Oh neil, your hair looks really good when you don't cut it yourself!
haha just kidding. :D
Post a Comment